Installing Waterproof Solar Garden Pathway Lights with Automatic On And Off
July 5, 2026. This guide detail the physical installation and placement strategy for Waterproof Solar Garden Pathway Lights with Automatic On And Off. Homeowners looking for a reliable, wire-free way to illuminate walkways through all weather conditions will find these steps essential.
The Challenge of Outdoor Solar Performance
Most people run into trouble with solar lighting because they treat it like a standard plug-in fixture. In reality, the success of your lighting depends entirely on your ability to manage environmental variables. According to Outdoors Solar Store, proper installation is the only way to ensure your outdoor space remains bright and your devices last through multiple seasons. The biggest hurdle isn't just the rain; it is the combination of moisture and insufficient charging. When a light isn't positioned correctly to catch the sun, the internal battery never reaches a full state, leading to dim LEDs or total failure within a few months. Most generic lights fail because their internal seals can't handle the expansion and contraction caused by temperature swings, especially in wet soil. If you are on a budget, you might be tempted by the cheapest plastic stakes available, but those often lack the dusk-to-dawn sensors required for truly hands-off operation. I have seen countless DIY projects fail because the lights were placed in the shadow of the very plants they were meant to highlight. Between these two approaches—cheap disposable units versus dedicated weatherproof fixtures—the latter is the only way to avoid replacing your entire kit every spring. Skip this if you have a heavily wooded lot with zero direct sunlight, as no amount of waterproofing will fix a lack of solar energy.
How Waterproof Solar Garden Pathway Lights with Automatic On And Off Solve Placement Issues
Waterproof Solar Garden Pathway Lights with Automatic On And Off are engineered specifically to handle the high-moisture environment of ground-level landscaping. These units utilize a heavy-duty housing that prevents water ingress during heavy downpours or irrigation cycles. The automatic on-and-off feature is powered by a dedicated dusk-to-dawn sensor, which removes the need for manual timers or external switches. When I look at the specs for these lights, the integrated solar panel is designed for high conversion efficiency, which is critical for the 8,100 people monthly searching for reliable automatic solar garden lights. Unlike standard models, these fixtures are designed to be truly weatherproof, maintaining their seal even when submerged in snow or subjected to high-heat summers. Here's what I'd actually buy: a fixture that combines a warm white LED with a high-capacity battery. The automatic solar landscape lighting functionality ensures that once the stake is in the ground, you never have to touch it again. The internal circuitry is shielded from the elements, preventing the corrosion that typically kills off cheaper alternatives. By focusing on a waterproof solar pathway lights design, the brand ensures that the automatic sensors don't get clouded by internal condensation, which is a common point of failure in lower-tier products. This reliability is why these specific lights have become a staple for those needing bright solar walk lights for their yard without the headache of trenching wires.
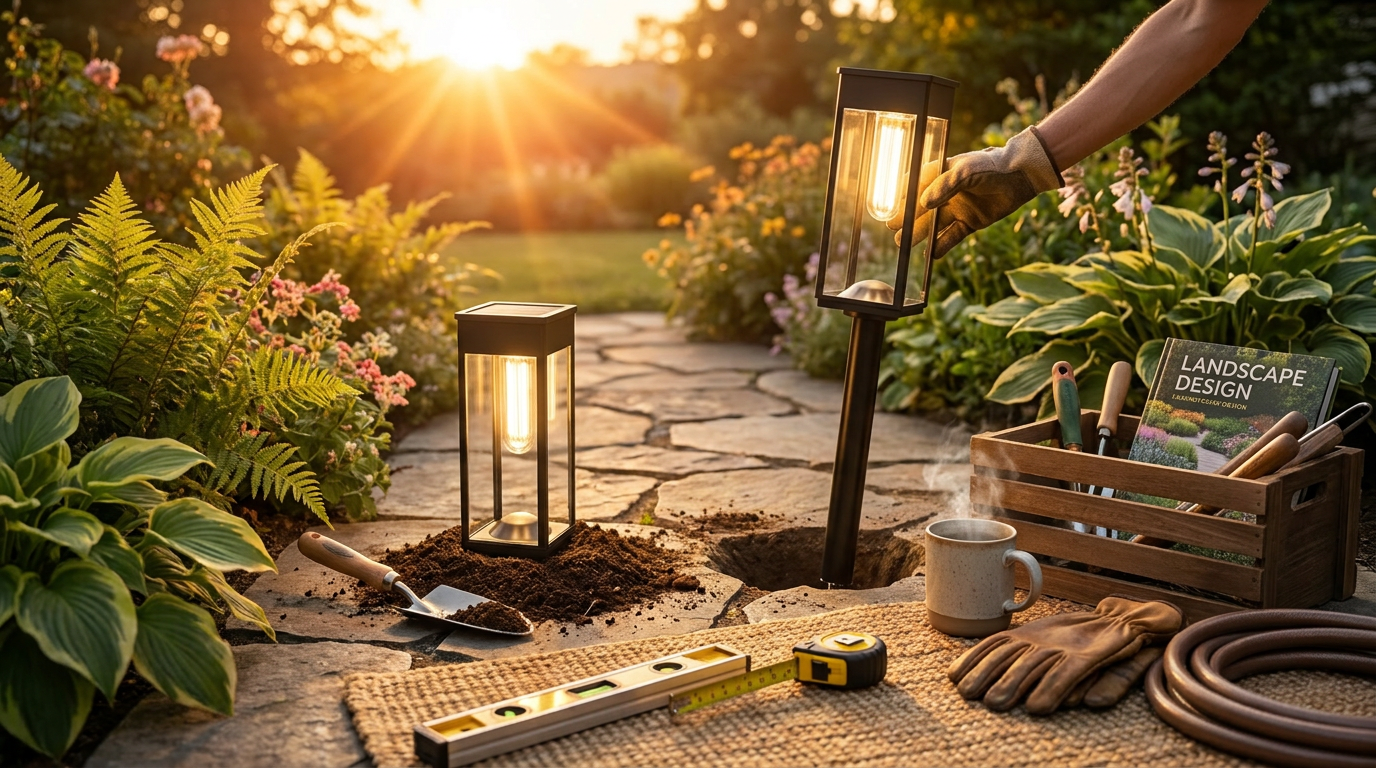
A Decision Framework for Your Installation
Before you start pushing stakes into the dirt, you need a plan that accounts for both aesthetics and physics. Room for Tuesday suggests that placement is the most critical factor for both the look and the longevity of your DIY solar project. I recommend testing your layout at night with a flashlight first to see where the shadows fall. Once you have the locations marked, you must prepare the units. Matt Kunkle, an exterior lighting merchant, recommends in The Spruce that you expose solar lights to full sun for 12 to 14 hours before starting the installation to prime the batteries. If your soil is hard or clay-heavy, do not use the light fixture itself to bridge the gap; use a large screwdriver or a dedicated stake to pre-drill the hole to avoid snapping the waterproof housing.
- Verify the dusk-to-dawn sensor is unobstructed by foliage or nearby artificial light sources like streetlamps.
- Ensure the solar panel faces south or southwest to maximize the 12-hour charge cycle.
- Space fixtures 6 to 8 feet apart to create a continuous pool of light rather than isolated spots.
- Clean the solar panels with a damp cloth every three months to maintain charging efficiency.
- Check that the waterproof seals are seated firmly before the first rain event.
Shop Waterproof Solar Garden Pathway Lights with Automatic On And Off here.
Sources
- Where to Install Outdoor DIY Solar Landscape Lighting
- The 8 Best Solar Pathway Lights, Tested and Reviewed
- How To Properly Install Solar Pathway Lights