How to Install Solar Garden Lighting with No Wiring
Transforming your garden, driveway, or walkway with beautiful illumination is easier than ever. With Waterproof Solar Garden Pathway Lights with Automatic On And Off, you can achieve a high-end look in minutes without the cost, complexity, or disruption of traditional wired lighting. These self-contained units are designed for immediate, tool-free installation, providing a brilliant and reliable lighting solution that requires no electrical knowledge, no trenching, and no connection to your home's power grid.
The Freedom of Easy Install Solar Garden Lighting with No Wiring
The primary advantage of our solar pathway lights is the complete absence of wiring. Homeowners traditionally faced a choice between expensive 120V systems requiring a licensed electrician and disruptive low-voltage systems that still involve burying cables. Wireless solar technology eliminates these barriers entirely.
- Zero Electrical Costs: Because the lights run on solar power, they add nothing to your monthly utility bill.
- Ultimate Flexibility: Easily place and reposition lights to match your evolving landscape, seasonal decor, or changing sun exposure. There are no cables tethering you to a single layout.
- Enhanced Safety: Without electrical cords, there is no risk of accidental cuts from lawnmowers or shovels, and the low-voltage DC power is inherently safer for homes with children and pets.
- Immediate Results: Go from box to beautiful in under five minutes per light. You can illuminate an entire pathway during a single afternoon.
A Simple 4-Step Guide to Installing Your Solar Pathway Lights
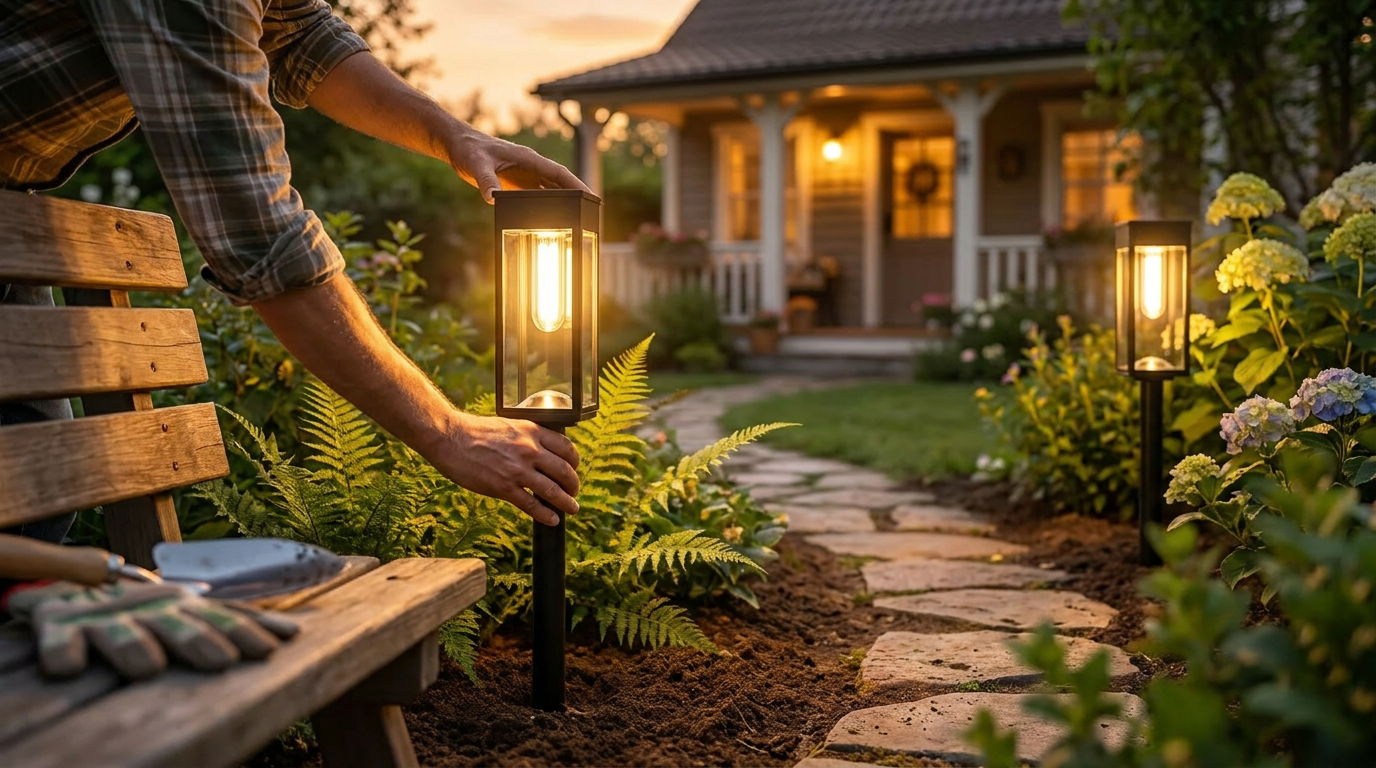
Installing Waterproof Solar Garden Pathway Lights with Automatic On And Off is a straightforward process that anyone can complete. For standard ground-stake models, you won't need a single tool.
Step 1: Unbox and Assemble the Components
Inside the box, you will find the lamp head (which contains the solar panel, LED, and battery), a connecting post, and a ground stake. Simply connect these three pieces. They are designed to fit together snugly by hand.Step 2: Activate the Light
Before placing the light, you must activate its internal battery. Most models have a small pull-tab under the lamp head or a discreet power button. Once activated, the light is ready to charge. It's best to perform this step in a bright area to confirm the light is off, as the sensor will prevent it from turning on in daylight.Step 3: Choose the Perfect Location
For optimal performance, placement is key. Find a spot along your path, garden bed, or driveway that receives at least 6-8 hours of direct sunlight per day. This ensures the internal battery gets a full charge to last through the night. Understanding how do waterproof solar garden pathway lights auto trigger is crucial, as the built-in dusk-to-dawn sensor needs a clear view of the sky to detect falling light levels and turn on automatically.Step 4: Secure the Light in the Ground
With the light assembled and activated, simply push the stake firmly into the soil. For best results, install after a rainfall or water the area beforehand to soften the ground. This prevents you from having to apply excessive force, which could damage the stake or housing. Do not use a hammer. The stake is designed to be inserted by hand into soft topsoil.Smart Technology for All-Season Reliability
Easy installation is just the beginning. The real value comes from the integrated smart technology that provides effortless, year-round operation. The "Automatic On And Off" feature means you never have to set a timer or remember to flip a switch. The lights manage themselves, providing illumination when you need it and conserving energy when you don't.
This autonomous function is powered by highly efficient solar cells and long-lasting batteries. According to the U.S. Department of Energy, solar-powered lighting systems have become increasingly reliable and are an excellent way to save energy in outdoor applications. Our lights are built to be durable, making them ideal as weatherproof solar yard lights for reliable outdoor safety in any climate. For those concerned about performance in darker months, choosing the brightest solar pathway lights for winter ensures you get dependable brightness even when sunny days are short.
Frequently Asked Questions
Do I need an electrician to install Waterproof Solar Garden Pathway Lights with Automatic On And Off?
No. These lights are completely self-contained and operate on a low-voltage, direct current (DC) solar circuit. They do not connect to your home's electrical system, so no professional electrician, permits, or electrical work are required.How do I prepare hard or dry soil for installation?
If your ground is too hard to insert the stake by hand, the best method is to water the area thoroughly and wait about an hour. This will soften the soil enough for easy insertion. You can also use a garden trowel or a long screwdriver to create a small pilot hole first.Can I install these lights in a shady area?
The lights will not perform reliably if installed in a location that does not receive several hours of direct sunlight. The solar panel needs to be exposed to the sun to charge the battery. A shady spot under a porch, dense tree, or eave will prevent the light from charging and may also interfere with the automatic dusk-to-dawn sensor.